It finally happened. I got my first paid request to build something for someone. Unlike a lot of our in-store customers at Tools for Working Wood I am a (pretty serious) hobbyist and not a professional woodworker. I enjoy trying to make a range of things, and often give them to folks in my life, or keep them myself.
But after I proudly posted a pic of the shousugiban bench I made (see previous blog) on Facebook an old friend called me asking if I could make her a similar bench and a table in the same style for her new patio instead of buying something. I was hesitant at first - I hadn’t made such large pieces before and would have to design it myself, something I have not too much experience with. But I told my friend yes I would do this, with a few caveats:
Caveat 1 - I’ve never done anything like this before.
Caveat 2 - I was not sure how it would turn out.
Caveat 3 - Since the bench was built in a 3 hour or so class, I figured it might take a few days - possibly a week or two - to build the three pieces.
Some of you might see problems arising already, especially with caveat 3. My week or two turned into many many months of slow going, lessons learned, and mistakes aplenty. I am contractually obligated by my friend who received this set to say that I am eternally grateful to her for her endless patience.
In the end however - self-doubting voices in my head aside - the set turned out not too bad IMHO, and most importantly my friend loves how it looks. In the spirit of finishing something new fraught with challenges I thought I would share some new things I discovered playing with fire a second time.
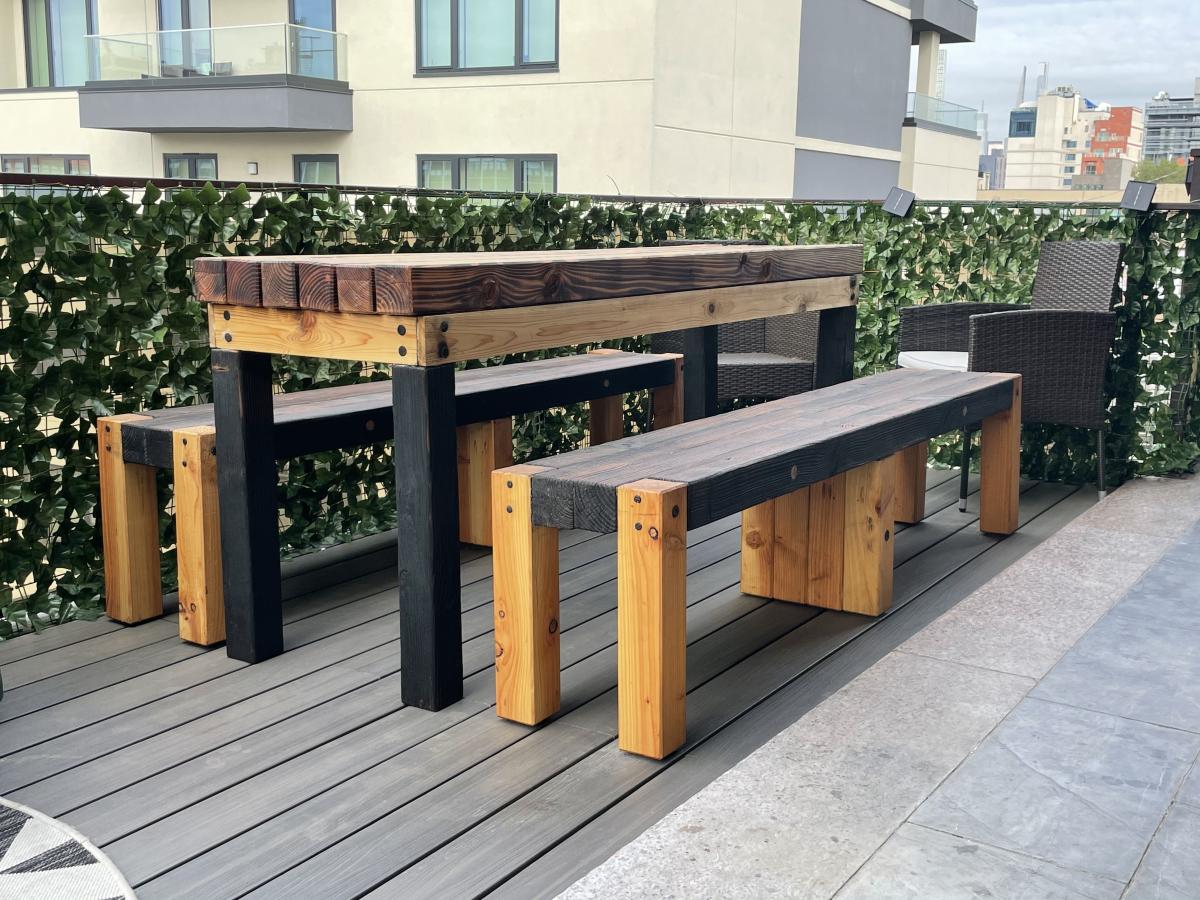
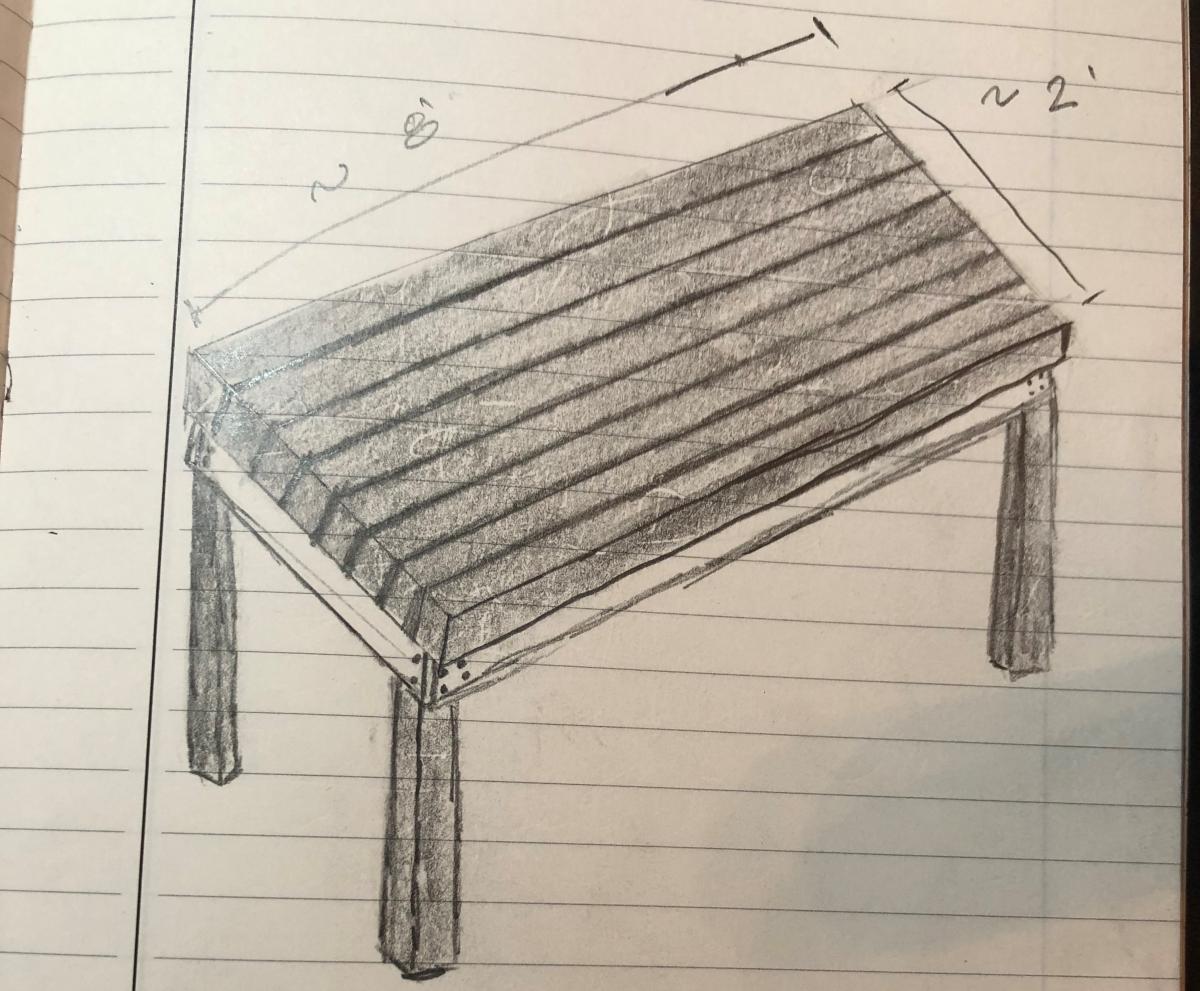
The project consists of two benches and one table, primarily made from rough 4” x 4” stock and some 1” for the table apron. This stuff was fun to work with but HEAVY, and as the components started coming together I needed extra hands to move it around. I might write about how we constructed it at a later point if folks are interested, but for this post I want to share about the fire.
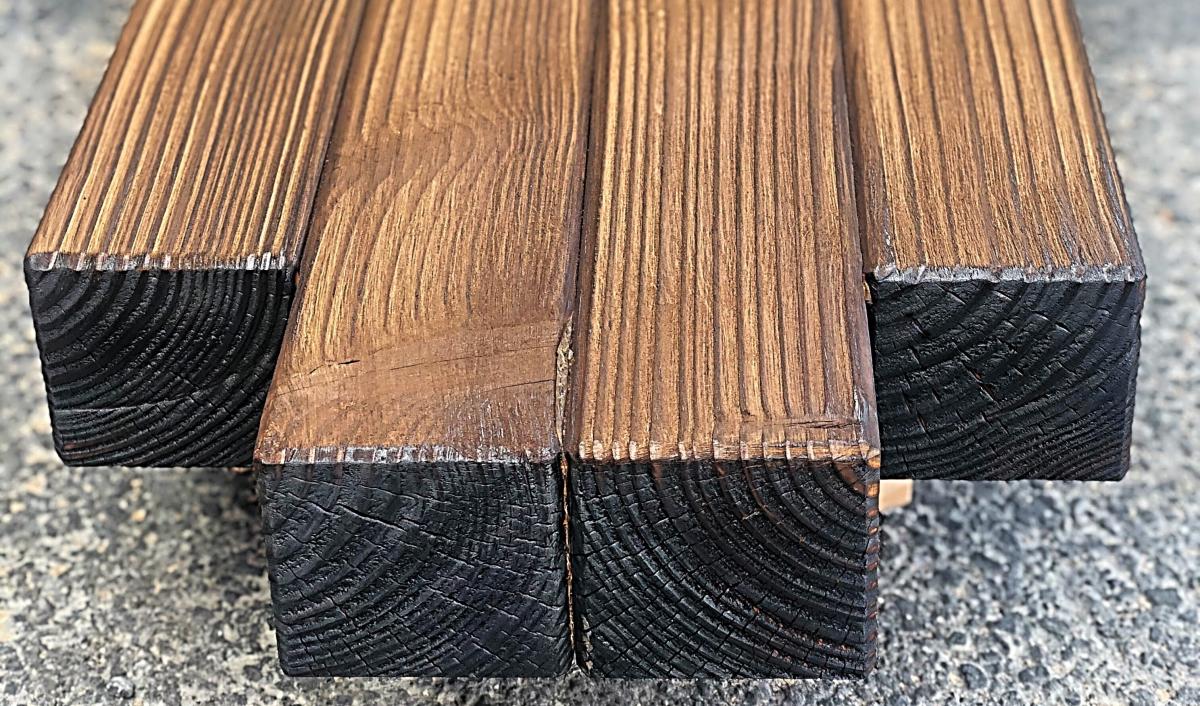
From top to bottom: Table top (4” x 4”), Table apron (1” x 3”), Bench tops (4” x 4”), Bench legs (4” x 4”)
For this project I played with 4 levels of burn. The table legs, sides of the benchtops, and some of the dowels got full burn, charred and not brushed off. The benchtops got full burn and were brushed off with a heavy wire brush, the table top and sides got a solid light burn, and the bench legs and table apron got no burn at all.
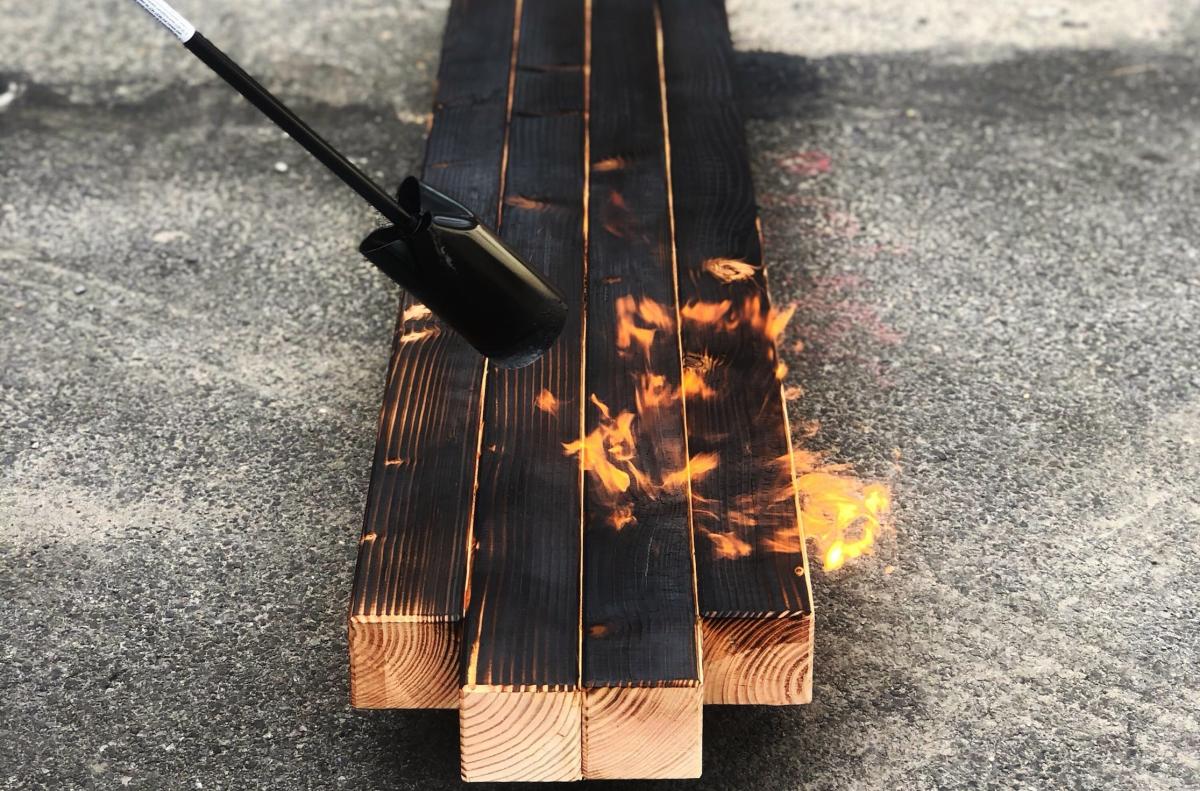
Full burn
As with my first ever shousugiban bench, I initially went with a full burn on the bench top and no burn on the legs - full burn meaning burning to the point that alligator skin-like crackling appears on the surface.
Burn baby burn! Using a weed torch attached to a standard propane tank we fully burned both bench tops - top, bottom, and sides.
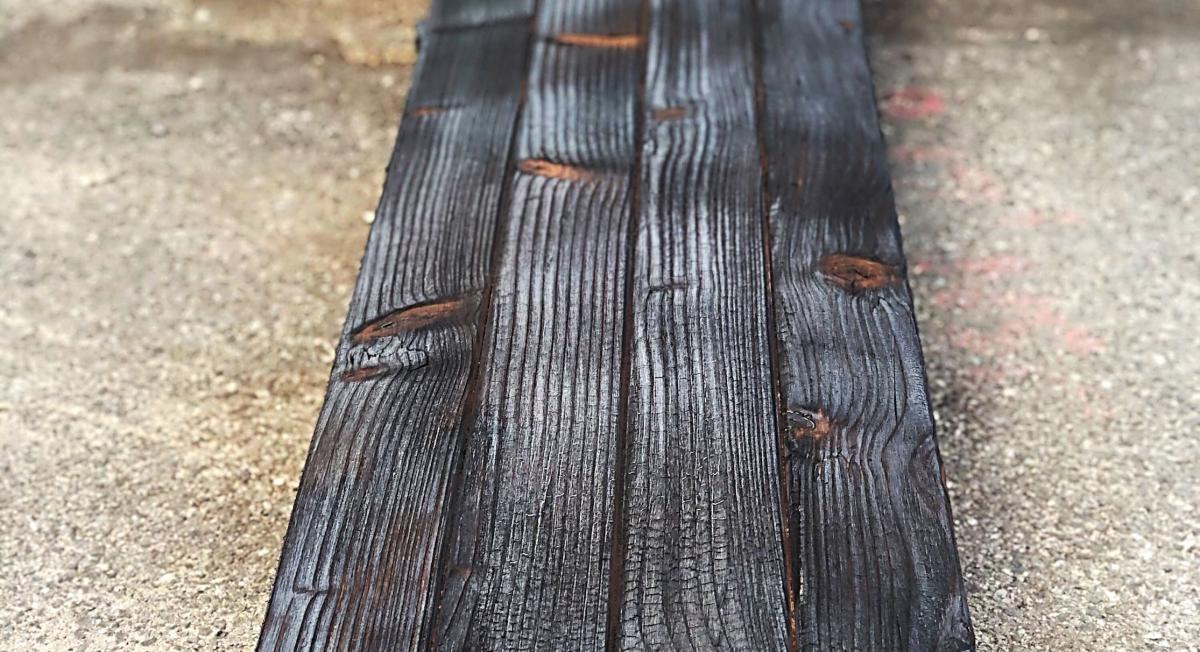
So dark and so pretty - you see why I don’t like brushing off the burn? Still working on what finish might best protect this level of burn without brushing...
My first shousugiban bench was for indoor use and just for me, so a few coats of Tried & True (linseed oil) was all I put on it. This set however is for outdoor use and needed better protection, and it was really difficult to get a protective coat over all that burned wood on the top of the bench. In case we wound up having to brush the char off the top, we tried burning once, brushing, and then fully burning again in case that might help leave a more burned look even after potential brushing.
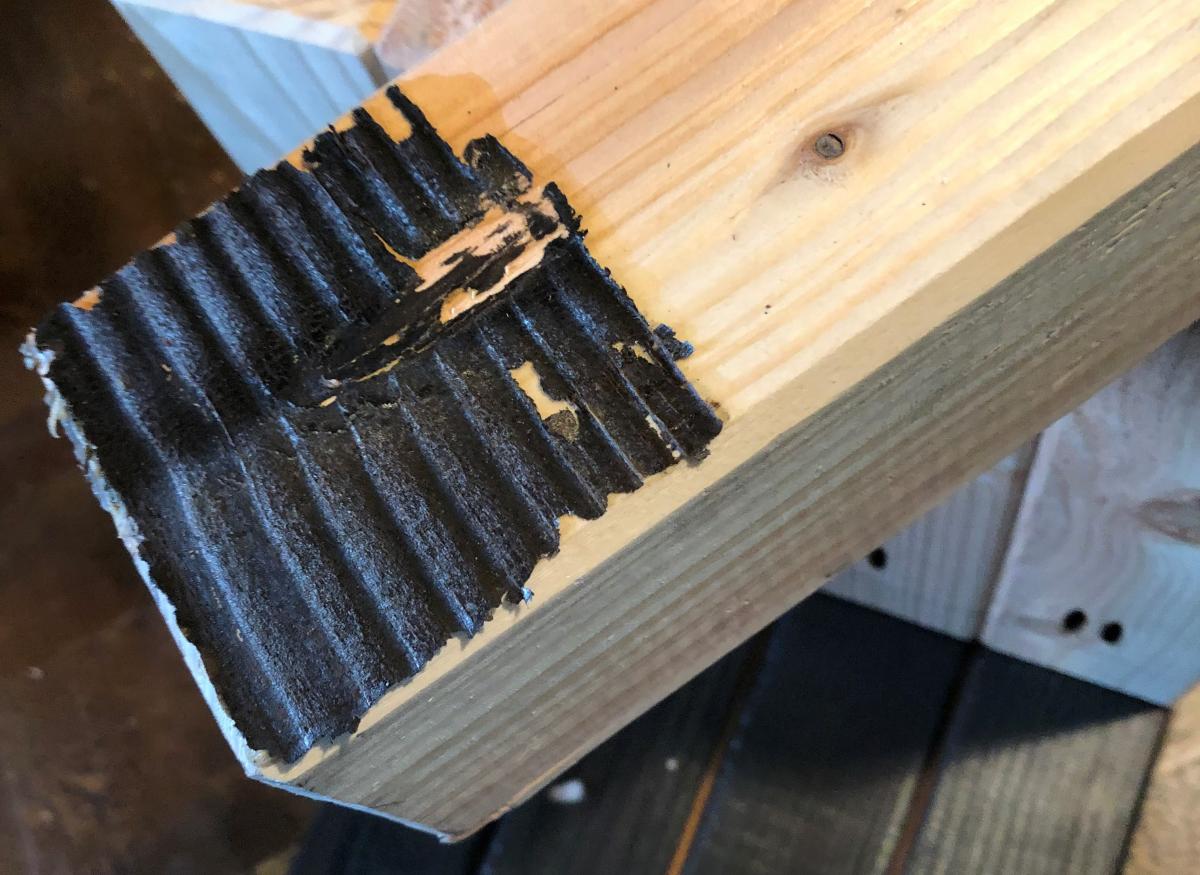
As an example of how finicky a fuller burn can be - when attempting to glue the legs to the top, we got the picture below. Lesson learned - brush well the parts to be joined, and if they won’t be seen anyway maybe don’t burn them!
Nope. It did not stick.
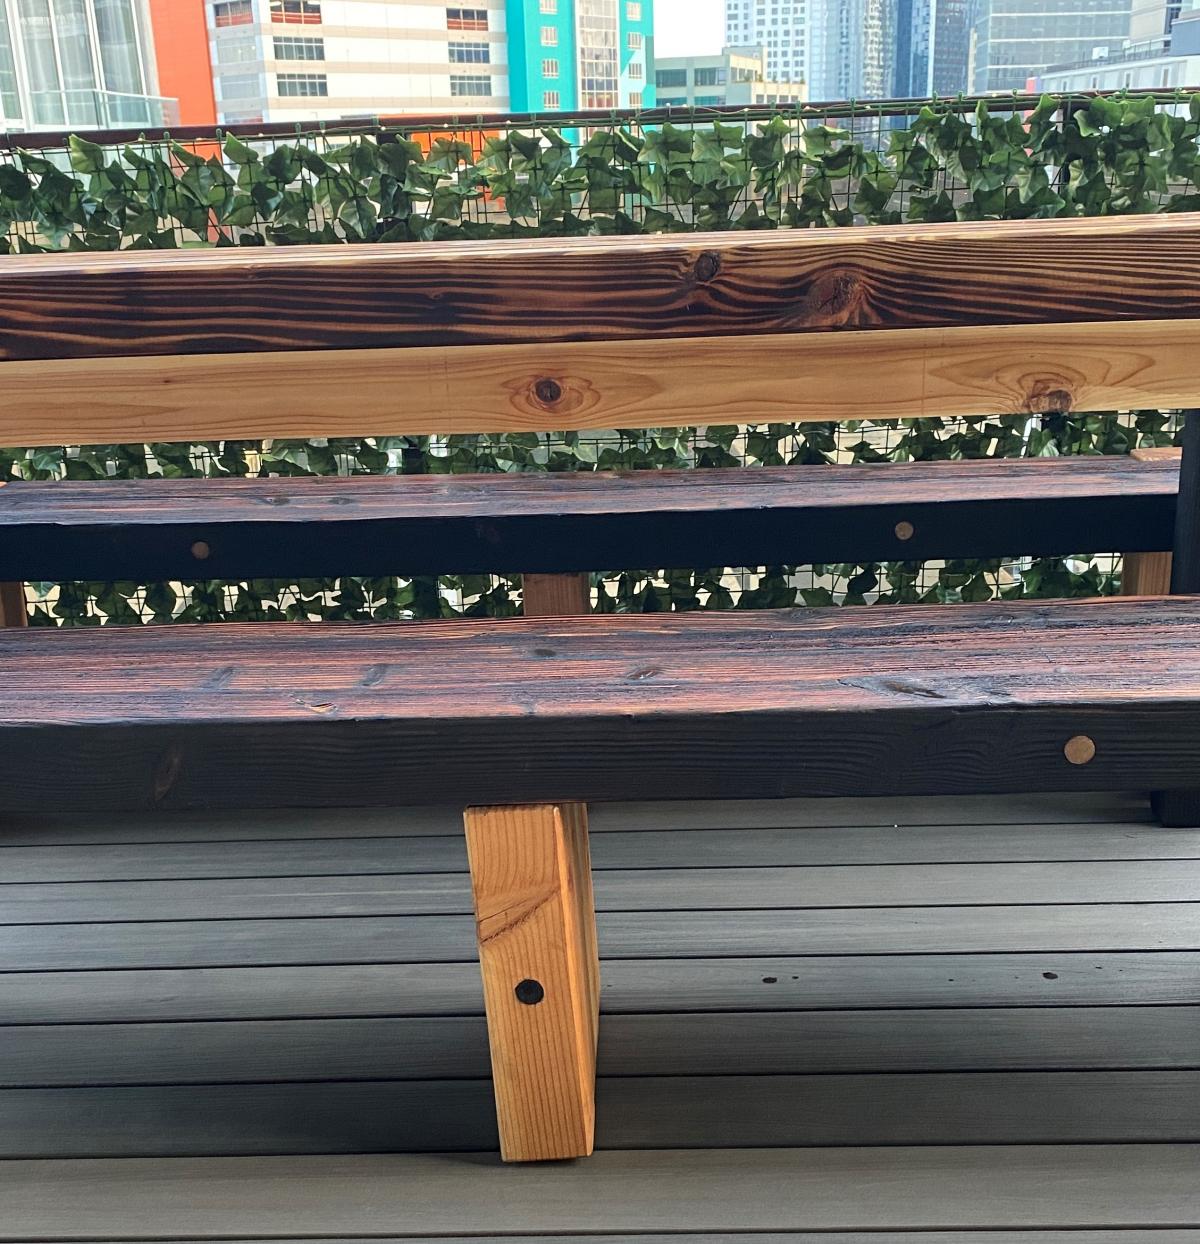
It didn’t make sense to keep the full burn on the benchtops - that was where people would be sitting and weather would mainly be hitting - and so we wire brushed them again and left them like that - still a nice look and gave a nice contrast to the sides of the benchtop. I felt (and hope I am right!) that the dowels, benchtop sides and table legs, and all the still-fully-burned areas last a long time. Though it might be fun to reburn them to touch them up as well.
Full burn and brushing
After the first burn and brushing. We left the sides and the end grain untouched.
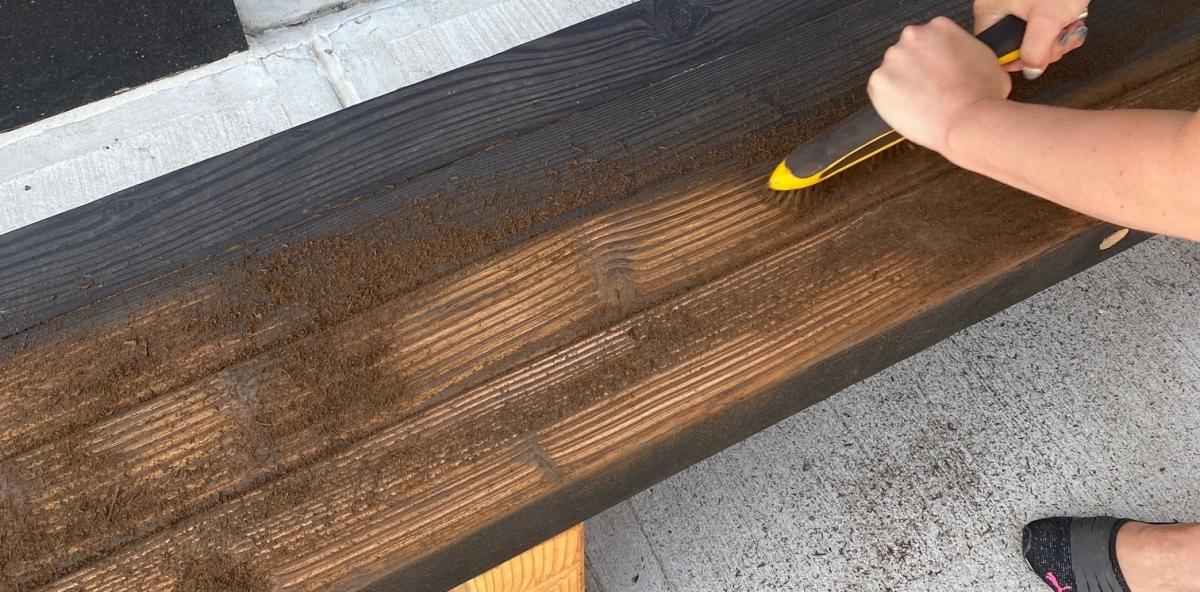
Most folks use a strong wire brush for removing the char of a fuller burn. Some prefer wire or nylon brushes/wheels that are used with an electric drill or screw gun. I’ve tried them all and while I prefer a brush like the one in the picture below, you can get a variety of looks depending on which method you use, so experiment away. As you can see in the picture above, when brushing off a fuller burn the denser darker parts stay raised as the more easily burned parts are removed and the wood underneath is exposed, giving a cool 3-D look and feel.
The second and final brushing did wind up a bit darker than the first, and with a slightly greater contrast between dark and light.
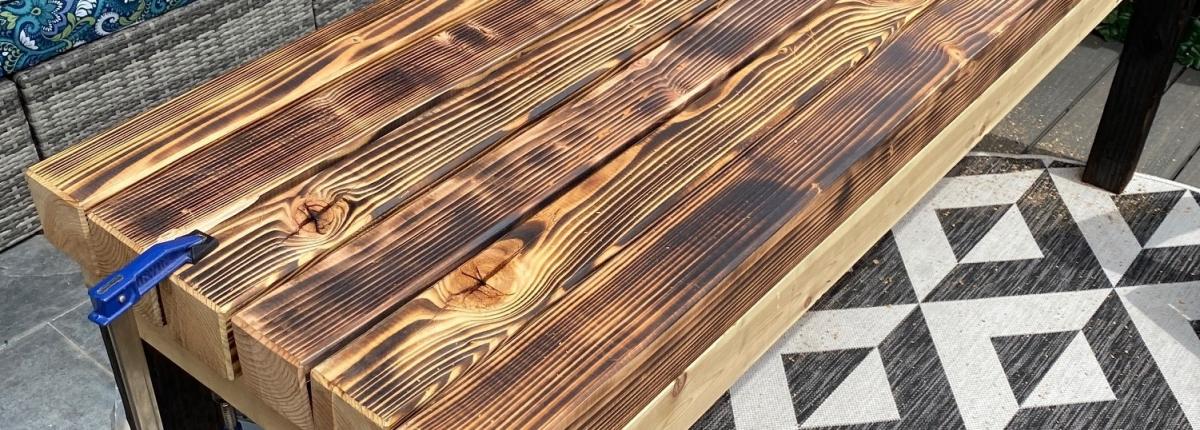
Light burn
A light burn on the table top.
Being so obsessed with full burns and how cool they look, I have long ignored what most folks do with shousugiban - a lighter burn like tiger stripes on your project. Different wood with different grains can give you an infinite range of looks. An additional benefit is that a lighter burn doesn’t change the texture of the wood that much if at all, which is why we chose it for the tabletop. An easy technique, it simply requires a bit of practice finding the right distance between the wood and your torch and the right speed to fill in the grain as shown above. It looks like magic when you get it right, pass your torch over the wood and a hidden picture appears.
This is the level of burn that many people enjoy on a range of projects and looks good on furniture and smaller items.
We finished the project with multiple coats of Real Milk Paint’s Outdoor Defense Oil - a nice combination of Pure Tung oil, citrus solvent, zinc for UV protection, and pine oil for moisture defense.
Sure it took way too many months to make beyond what I promised, but I learned a ton along the way and I am really proud of the end product. I tend to always over promise and underestimate how long things will take to make. Would love to hear any tips you all have for more accurate estimates or stories of how long your longest project took to finish…
(Huge thanks to Eddie O’Donnell as always with this project!)
Join the conversation
06/03/2021 Morgan Holt
I like the look and your consideration of legs burned and then brushing the tops is a great look. If you burned and brushed them all it would loose it. Did you burn the dowels first, or make a steel part to protect the surrounding areas or just burn them all and careful brushing.
My only other critique is the ends of the table. You picked some nice rift sawn material which looks good. Maybe you could have arranged them so the had a wave like flow from one end to the next. Also, there are two ends that show the saw marks. Better to use a hand saw so that does not occur?
A nice story and an interesting look!
06/03/2021 Joe Samalin
Morgan - thanks a lot for the feedback and advice. I didn't even think of aligning the ends aesthetically, great call. Most likely missed it because the wood had warped so much and I didn't have a good way to square it up, and so went with top aesthetics and least warped. So never even realized the end look, but would have been nice, burned or not, to align them so. The dowels I burned the ends of pre-installation, but also played with some different ways of blocking - we had to saw down some we had installed and then burn. Still figuring out best way to burn one specific area!
Thanks again!
07/08/2021 Jason Ellis
Hey Joe, I have been looking into coatings for burned pieces myself, the best bet seems to be Osmo Polyx to protect the heavy burn.


 Joel's Blog
 Built-It Blog
 Video Roundup
 Classes & Events
 Work Magazine
My only other critique is the ends of the table. You picked some nice rift sawn material which looks good. Maybe you could have arranged them so the had a wave like flow from one end to the next. Also, there are two ends that show the saw marks. Better to use a hand saw so that does not occur?
A nice story and an interesting look!
Thanks again!